Using KM, Keymap-Master, to create a device upgrade
Back to IR Help
Before you open Keymap-Master you need to check a few settings.
Keymaster has been tested on Excel versions from 97 to 2010.
Security
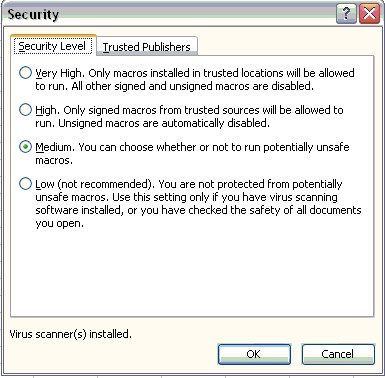
You will need to set your Excel Macro Security to Medium to allow unsigned macros to run.
Select Tools -> Macro -> Security
Getting Started
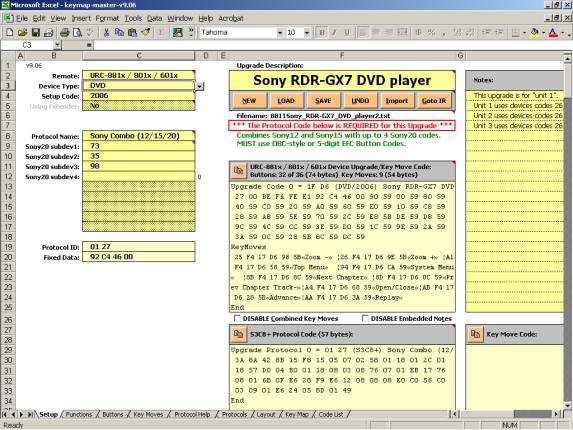
When you open Keymap-Master it looks frightening, but it is actually very user friendly
If you are going to look at an existing KM sheet press [Load] and locate the KM file.
After you've made your own KM sheet you'll use the [Save] button to save the KM sheet, not the typical File-> Save from the menu. You don't save the whole worksheet, only your data.
Figure 3-8 shows the setup screen. We will be interested in the Setup, Functions, Buttons and Protocol Help tabs.
Customizing
To make the upgrade work for your device you need to follow these steps.

Whether starting an upgrade from scratch or using one of the Upgrades you found at the JP1 you must change the remote to match your remote model. You must select a device type to determine which layout you are going to use. The device type determines which keys will be available without using keymoves. This TV code is going to be operating an alarm clock. A TV doesn't have to use a TV device type.
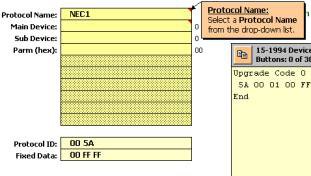
You must assign your upgrade a 4-digit setup code. You are absolutely free to use any setup code number that you like, in the range 0000 through 2047. If you use a number that is already in the remote's built in code library, you will override that number, which means you will no longer be able to use the built in code, but you won't get an error message or anything.
For that reason, we generally advise that you use numbers that are more obviously your own and that don't override built in numbers, such as 2000, 2001, 2002, etc - but it's your choice.
Next you need to specify your protocol, and supply the required protocol information. You can find this information in your learned signals. I'll show you two examples.
Signal Data
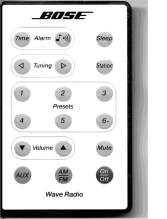
You can easily create your own upgrade from learned signals. In this first example we are creating an upgrade to control an alarm clock.
I've learned all the signals into my remote. They all were NEC2 protocols with a Device code 186. I fill in the protocol and device numbers from my learned code on the Setup Screen and then moved on to the function screen where I set up a list of all the functions that were on my original remote.
Once you pick the protocol Name from the dropdown list, you should read the Protocol Help to see if there is anything unusual about the protocol you are using.
Protocol Help
![]()
Protocol Help told me that there are 2 NEC protocols, and the big difference is the repeating characteristics when the button is held down. Since the Device/Sub-device numbers remain consistent there is no need to use a special protocol.
Functions Sheet
Fill in the Functions Sheet and protocol information as shown in Figure 3-11.
Note the function page, specifies the functions of my original remote.
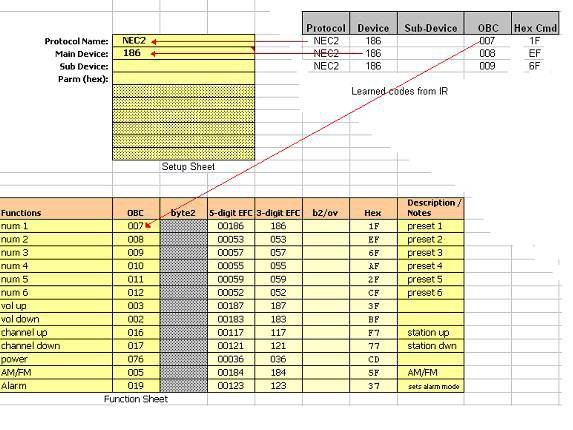
Figure 3-11
Complex Example
SOMETIMES IT IS A LITTLE MORE COMPLEX.
In this second example the learned codes from this Sony remote had buttons that decoded showing 3 different device sub-device combinations of the SONY20 protocol.
How do you get that to work? You use a SONY Combo protocol.
How did you know that? You switch to the PROTOCOL HELP and read something like this.
- Sony Combo (12/15/20):
- This combo protocol allows you to combine as many Sony12 and Sony15 codes as you like with up to 4 Sony20 codes. You enter the codes for the functions in OBC format as usual. Then in the byte2 column you enter the Sony12 or Sony15 device code. For Sony20 functions, you need to enter the 8-bit subdevice code (0-255) in the four device code cells in the Setup sheet. Then in the byte2 column you need to enter a 1-digit number indicating which of those 4 sub-devices you wish to use (1, 2, 3, or 4), followed by a space, followed by the 5-bit main device code (0-31).
The Functions sheet refers to the functions your equipment will perform when the original remote buttons are pressed. A common error for newbies is thinking that these functions are your remote buttons. You should rename the functions to match your original remote. Make sure to note any buttons that have dual functions.
Buttons Tab
After you set up your functions, navigate to the buttons tab and match buttons to functions. Notice on the Buttons screen (Figure 3-13), some of the button names start with an @. Buttons names that start with an @ are not part of the button layout for the device type you chose on the setup page. Functions that you assign to these keys will be translated to a Key Move when you paste your results into IR. Also any functions that you assign to a shifted button (column D) will also be assigned as a keymove.
Functions that appear grayed out in column F have been assigned to a button at least once.
Is there any way to include the shift functions as part of the device upgrade without affecting the move/macro memory?
We are limited by the device key maps that are built into the remote's permanent memory, there is nothing KM or RM can do about that. KM tries to make the process as painless as possible by letting you program these buttons at the same time as creating the upgrade, but it's impossible to include shifted buttons in an upgrade unless the shifted button is part of the built in key maps.
After you have assigned your buttons navigate back to the Setup tab screen.
Copy Upgrade to IR
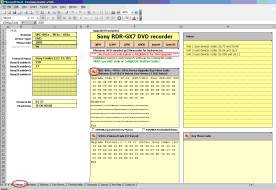
After you have assigned your buttons, switch back to the {Setup} tab shown in Figure 3-14.
You are now ready to transfer the information to IR
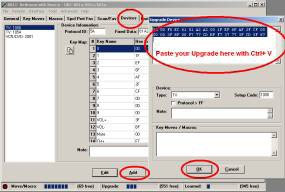
- Copy the Device upgrade.
- Switch to IR
- Select the {Device Tab}
- Click [Add]
- Paste the upgrade [Ctrl]+[V]
- Click [ok]
|
|
| Keymap Master | IR |
|---|
Figure 3-15
Switch back to Keymap-Master
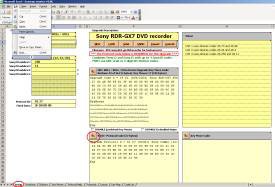
If there is a Red Notice that says *** The Protocol Code below is Required ****
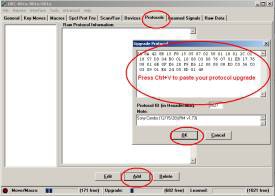
- Copy the Protocol Upgrade
- Switch to IR
- Select the {Protocols Tab}
- Click on [Add]
- Paste the upgrade [Ctrl]+[V]
- Click on [ok]
|
|
| Keymap Master | IR |
|---|
Figure 3-16
Save Your File
Switch back to Keymap-Master The final step is to save your work. Don't use the File -> Save command. Instead press the [SAVE] button on the {Setup} page. This will just save the upgrade portion of the spreadsheet as a .txt text file.
