
| The Robman wrote: |
| You enter the characters either by using the numeric keypad, where the letters are printed above the numbers just like on your telephone |
| vickyg2003 wrote: |
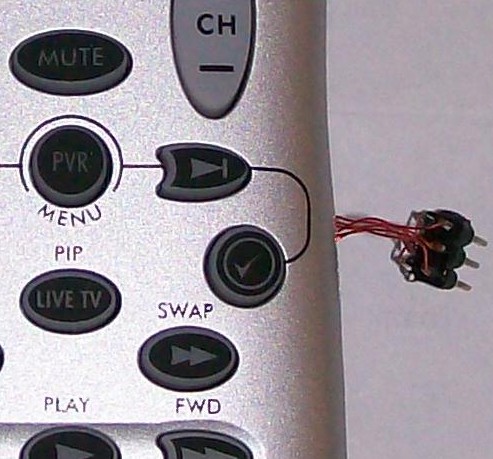
| No PIP keys? !! This one definately wouldn't pass the with the sports fans in this house. As it is they can't remember that MOVE moves the PIP, how would they do without labels! |
| vickyg2003 wrote: |
| No PIP keys? !! This one definately wouldn't pass the with the sports fans in this house. As it is they can't remember that MOVE moves the PIP, how would they do without labels! |
| The Robman wrote: |
| 2) It has the same backlight characteristic as the URC-8910, etc where the light turns off while you hold a button down. |
| underquark wrote: |
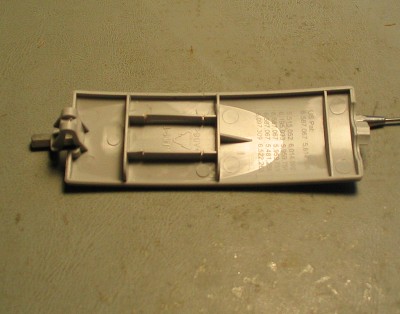
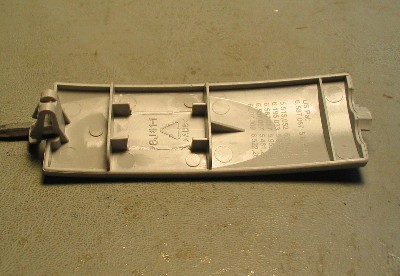
| Is there space at the butt end to cut a hole and to shoehorn in a 8P8C, RJ45, Firewire or other common socket? |
| The Robman wrote: |
| As to the other question, UEI doesn't upgrade RS remotes. |
| mr_d_p_gumby wrote: | ||
|
| jherrick wrote: |
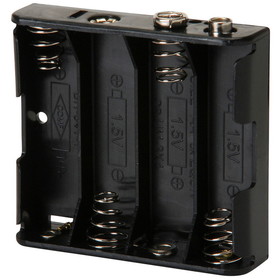
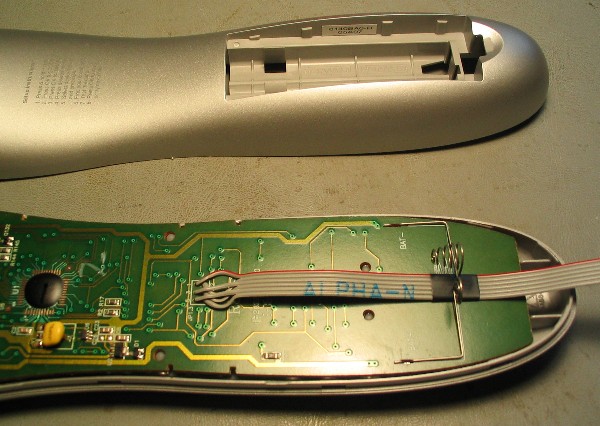
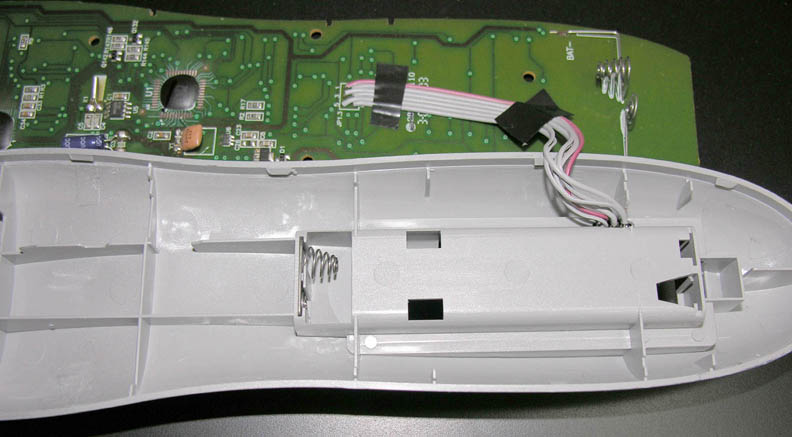
| Rob, based solely on your pics, it looks possible to make something of a header that would go in the battery compartment, but we'll soon see. |

| The Robman wrote: |
| No, it's spray painted silver like the URC-8810 that Walmart used to sell. |
| The Robman wrote: |
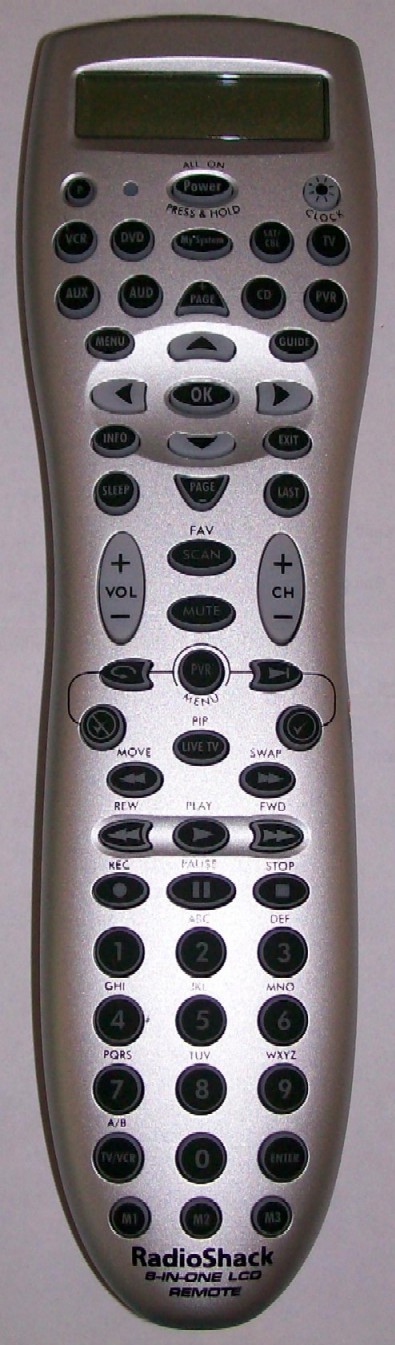
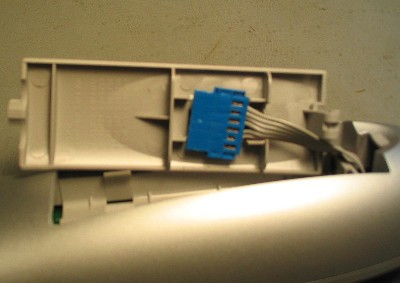
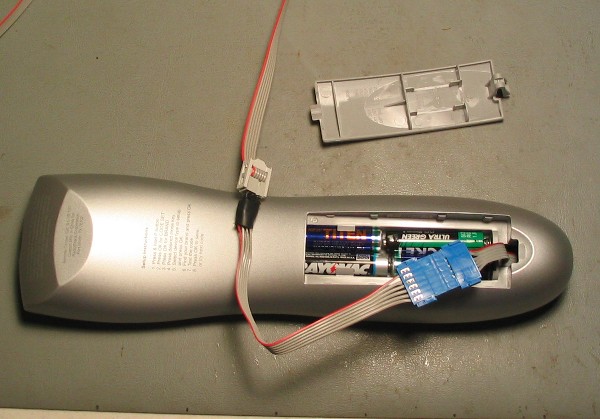
| I think the only possible solution that we can come up with is something like this... |

| jherrick wrote: |
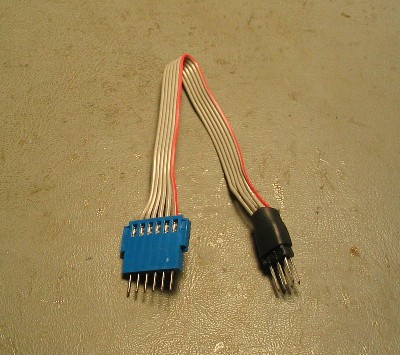
| If one were to purchase this cable from Digikey, and this receptacle and this plug, one could make the following modification. |
| The Robman wrote: |
| Only one of those links work, maybe you should post the part numbers instead as I'm curious to see what the parts cost. I see the cable is $3.15 or $2.62 if you buy 10. Obviously, I'm thinking about the feasibility of one of us offer these ready modded. |
| Capn Trips wrote: |
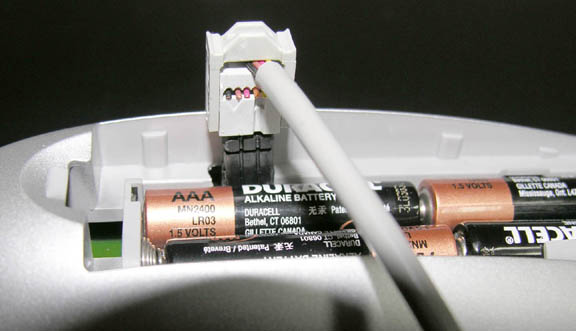
| Question on the mod. It may be too soon to tell, but with the ribbon cable running through the battery cover clip opening and "resting" in the battery cover, I presume that there is some degree of care required when removing the battery cover. Is that a potential weak point? i.e. cable stress or battery cover clip stress or something? |
| jherrick wrote: |
| Also, as a last point, there is ample room where the cover clip resides to route the cable. Incidentally, there is also room to place six pads there, and thereby make things infinitely easier for us in the jp1 group. |
| Capn Trips wrote: |
| Cool. Looks like the Audio map is not mapped to the AUD device button - it appears as a phantom on the RM Layout page. |
| Code: |
| [Protocols]
0000, 0002:5, 0005, 0006, 0007, 0008, 000A, 000C, 0011, 0013, 0014, 0015, 001A, 001C, 001D, 001E, 001F:8, 0021, 0022, 0027:new, 002A, 002D, 002F, 0032, 0034, 0038, 0039, 003D, 003F, 0045, 0056, 0058:2, 005A, 005C, 005D, 005E:2, 005F, 0060, 0061, 0065:2, 0067, 006A, 006E, 0073, 007E:3, 0083, 0085, 0092:3, 0093, 0098:2, 009C, 009E, 00A4, 00A9, 00AF, 00B6, 00BB, 00C4, 00C9, 00CA, 00CD:2, 00D0, 00DE, 00E2, 00E7, 00E8, 00E9, 00F2, 00F5, 00F8:3, 0103, 0109, 010C, 010F, 0111, 0114:2, 0117, 011A:2, 011B, 011E, 0125, 012A, 0162, 016C, 016D, 017E, 0182:2, 0184, 0186, 018B, 01A4, 01BA |
| The Robman wrote: |
| Make sure you're using the latest version of IR, otherwise it won't recognize the S3F80 processor. |
| rickspindrift wrote: |
| Does anyone know the size of the EEProm? |
| rickspindrift wrote: |
| Any idea how hard it will be to adapt the 8910/9910 extender for this guy? |
| rickspindrift wrote: |
| Any idea how hard it will be to adapt the 8910/9910 extender for this guy? |
| The Robman wrote: |
| Completely impossible. |
| Quote: |
| Is an extender possible for this remote? |
| jherrick wrote: |
| As I can't predict the sales of these kits, and the cables are a little pricey, I won't make a lot right away. |


| Tommy Tyler wrote: |
| See the file at http://www.hifi-remote.com/forums/dload.php?action=file&file_id=5127 for the latest on modifying a 15-100.
Tommy |
| venik wrote: |
| With the learning, macros and keymoving, I am not even sure the JP1 is needed, at least for my setup. |
| The Robman wrote: |
| The problem is that the holes don't line up with any hole in the casing, and even if you were to cut a hole, the pins would block the batteries |

| Code: |
| My System Channel Device =$01D.7.8.0.0 DeviceButtons
My System Volume Device =$01E.7.8.1.0 DeviceButtons My System Transport Device=$01F.7.8.2.0 DeviceButtons My System Menu Nav Device =$020.7.8.0.0 DeviceButtons Language=$022.0.1.0.0 (English;Spanish) |
| tzoom84 wrote: |
| As some of you owners probably know, the left-arrow and exit buttons for the 15-100 are un-learnable. These two are built into the remote as 'exit' functions while using the built-in menu.
I was curious that, since these are functions internal to the remote, can they be reprogrammed through JP1 programming (KM or RM)? Or are they strictly fixed and untouchable? |
| tpaxadpom wrote: |
| ...Playing for 30 minute with this thing I realized it is useless without JP1 programming... My old trusty 8910 is wearing out... |
| tpaxadpom wrote: |
| Playing for 30 minute with this thing I realized it is useless without JP1 programming. |
| tpaxadpom wrote: |
| My old trusty 8910 is wearing out. Two of the screw threads that hold PCB and front panel are busted so I have to press really hard on TV and SAT buttons. I added some paper and tried to apply pressure with the back cover but have very limited success. |
| cauer29 wrote: | ||
Beware the 15-100 is a JP1.3 remote and the JP1 cable you may have been using with your 8910, will not work with the 15-100. The other difficulty is that there are no JP1 header pins on the 15-100, nor is it particularly easy to add them. If you have a JP1.3 cable and are sufficiently skilled, these difficulties can be overcome. A.A. |
| The Robman wrote: | ||
Have you tried using screws that are very slightly larger than the original screws? Given that the casing is plastic, even if the original threads have worn out, it's sometimes possible to force new ones by using a larger screw. Just don't use screws that are so large that the casing will split. |
| tpaxadpom wrote: |
| If I get Harmony 1100 as Fry's promised I may keep it for my wife. I personally hate touch screen remotes. 15-100 is very similar to 8910 but has extra buttons for PVR (worked very well already tested at my mom's place).
I put in so much work to get all components working, from FTA receivers to controlling PCs. Perhaps I should have ordered another 8910, but I don't like to pay more when the same item from the same seller was $10 cheaper couple of weeks ago. Assuming I can get 15-100 jp1 ready I should be half way there as I saved files for all components. |
| Julie5040 wrote: |
| Sorry to resurrect such an old thread, but I got a new TV for a game room and it looks like the remote codes don't exsit anywhere. Guess that means time for KM (been a while, but I think I'm still up to the task) Thanks for the input and the advice!! |
| Jim14 wrote: |
| I have a couple of these. They are great but I never got around to putting in the JP1 connector. Now I need to set a button to toggle which I don't think I can do without the connector. But the thread is so old the pictures of jherrick's mod don't show up. Any way to get those? I tried the wayback machine but no luck. |
| Jim14 wrote: |
| I also see that the link to the hardware forum from the main page doesn't work. Something wrong with the link. But the posts are still there - just difficult to get to. |
| The Robman wrote: | ||
I have emailed Jim Herrick to see if he still have the pics of his mod, but it was from 10 years ago, so who knows how many new PCs he's had since then. Here's a link to his post... http://www.hifi-remote.com/forums/viewtopic.php?p=58992#58992 |
output generated using printer-friendly topic mod. All times are GMT - 5 Hours